I came across a cross-post on Reddit today where the OP reposted a very outdated tutorial to create an ASP.NET login page revolving around old versions of ASP.NET (think .aspx pages, yuck!). I thought it would be a good opportunity to write a blog post highlighting a modern approach by detailing how easy it actually is to scaffold a new ASP.NET Core MVC App that includes Identity.
I submitted a reply whereby I greatly simplified the process on the surface:
File -> New project -> ASP.NET Web Application -> name it -> tick “individual user accounts box” -> create
Press F5
Job done
When I thought about it further I realised I wasn’t actually that far off the mark.
Obligatory notes:
- this post is intended for a noob ASP.NET Dev and doesn’t require any pre-existing knowledge within the eco-system.
- this post assumes that you have Visual Studio 2019 installed with ASP.NET Core dependencies.
- this is intended to form the path of least resistance.
- what I post here is in no way meant to be the job done version of a production app.
Create a new project
Start up Visual Studio 2019
Either click:
Create a new project
Or click:
File -> New -> Project
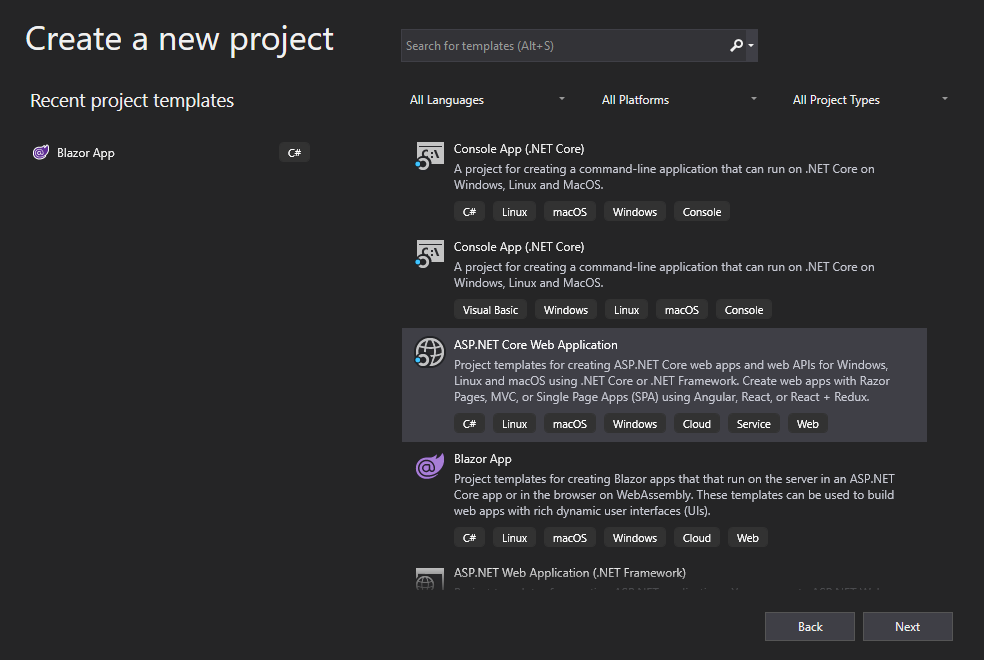
Then select:
ASP.NET Core Web Application -> Next
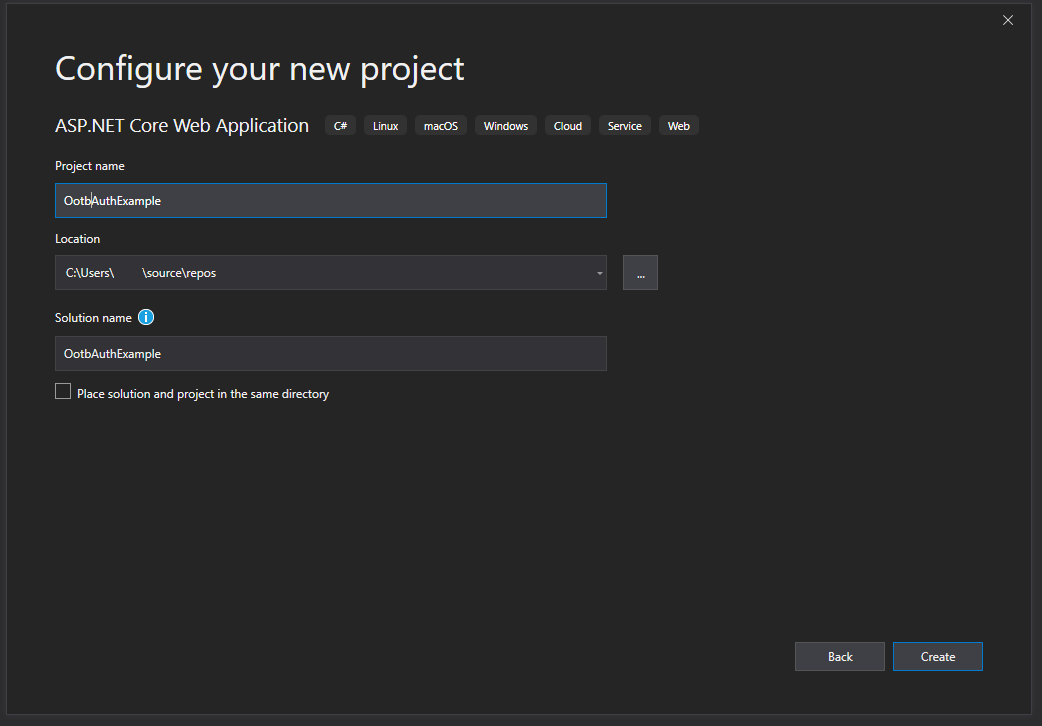
Next, name your project and select the folder to store the files in (simple stuff so far, it doesn’t get much more complicated).
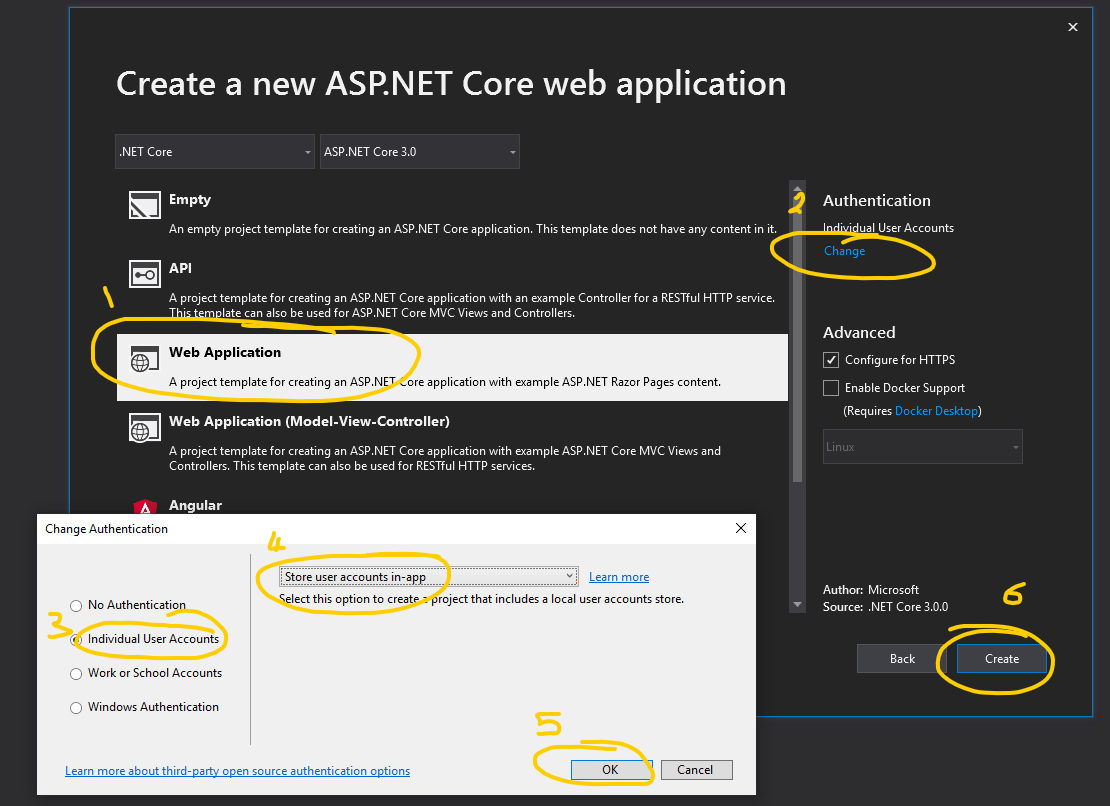
Now we will configure the app, there are a few steps here:
- Select Web Application
- Authentication -> click Change
- Change Authentication -> Individual User Accounts
- Click the drop-down and select Store user accounts in-app (if not already selected)
- Click OK
- Click Create
Database schema
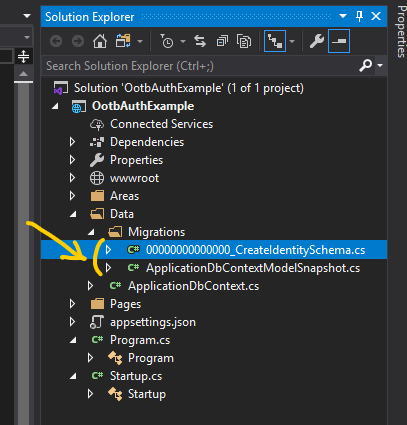
Return to Visual Studio, navigate to:
Solution Explorer -> [SolutionName] -> [ProjectName] -> Data -> Migrations
Within that folder you’ll see your database context and a database schema that will form the basis of your database structure.
If this is your first rodeo, I suggest you do some more reading on Entity Framework Core.
Don’t worry too much for now, as mentioned earlier, this is a very shallow dip of the toes merely intended to highlight ease of creating an identity enabled web app - I digress.
Run the app and register a new user
If you know ASP.NET with Entity Framework already you’ll observe that what I am doing next is out of order, however the intention is to show what the ASP.NET Dev virgin will see when they scaffold the project and simply hit run.
Do that now; press [F5].
Your browser will open with your shiny new, albeit very sparse web application; time to register a new user.
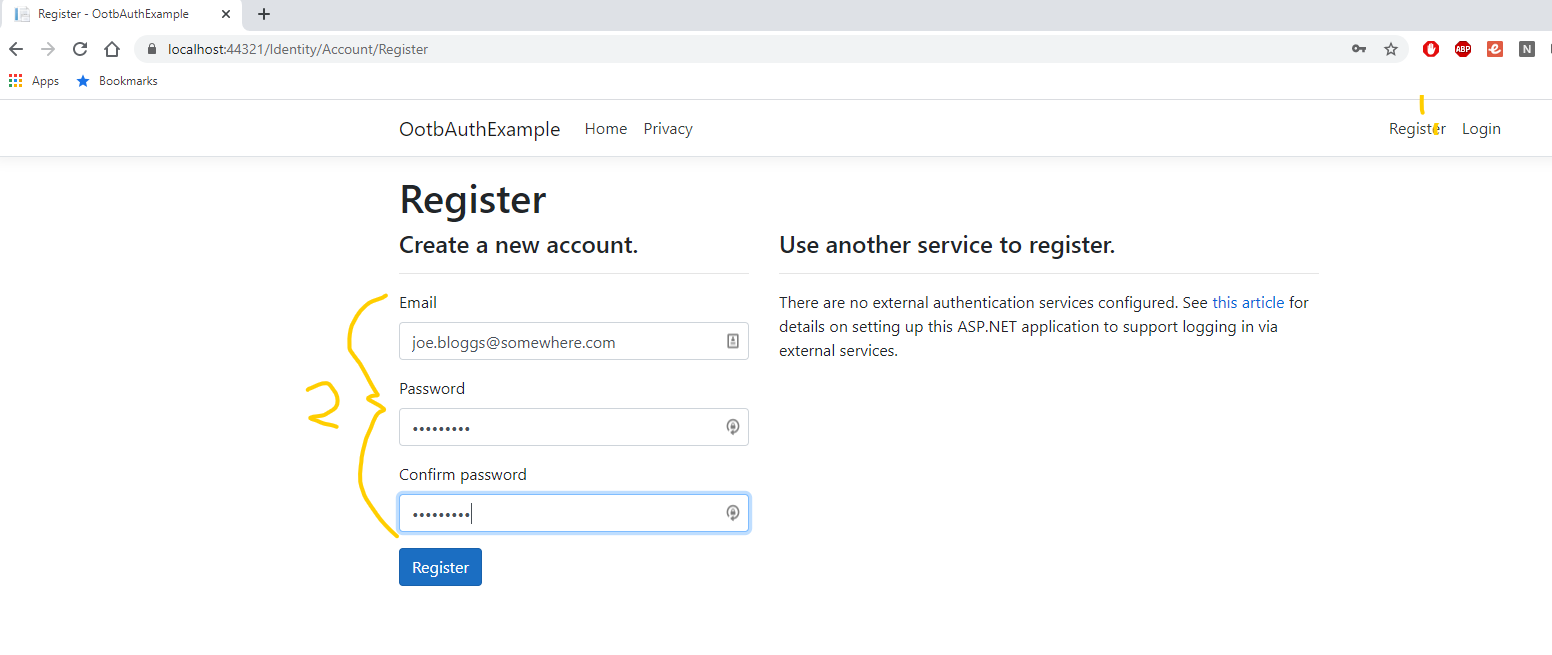
- Click Register in the top right.
- Populate credentials as you normally would.
- Then click the *Register button.
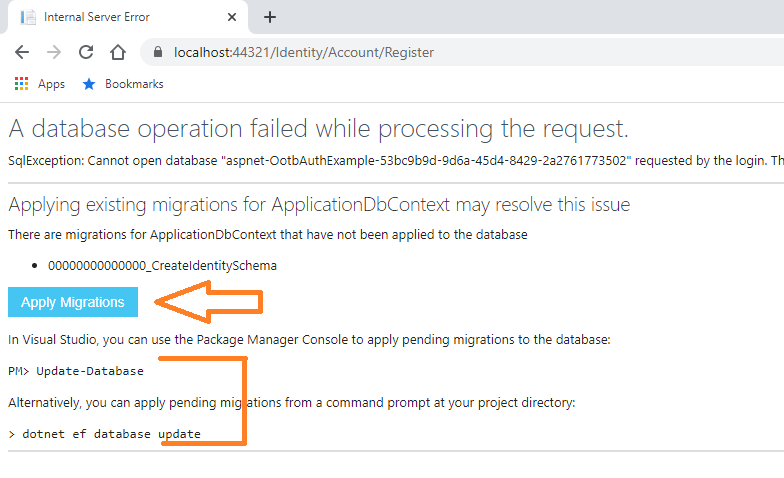
Womp womp! Remember me saying I was doing this out of order? Yeah, I knew this would happen.
Run the database migration
What’s happened here is that the database instance doesn’t yet exist. You’d typically run the migration and (potentially) seed the database with initial values before even bothering to try to run it, but no matter, whilst running the actual app we’re actually provided with a very easy way to invoke the migration.
The error messages we receive are very clear on what has occurred here. Simply click the Apply Migrations button.
Alternatively, you could run either of the indicated console commands - but that’s not necessary in this case.
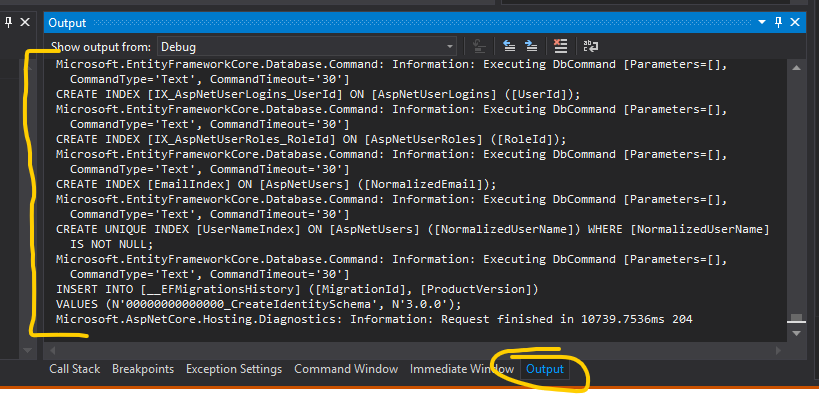
Return to Visual Studio and open up the Output window. It won’t mean much yet, but you can monitor the progress of the database migration to your local machine. It’ll tell you when it’s complete.
Register a new user, part deux
Return to the running app in your browser and Register a user (again). Pay attention to your password. This is what you’ll receive upon successful registration, click Click here to confirm your account.

Why must we do this?
The default configuration requires a confirmed account, just do it and trust me on this one :D
Don’t trust me yet? View the Startup.cs file in the root of the project, look for the section with an invocation of IServiceCollection.AddDefaultIdentity
// ./Startup.cs

{
    // elided
    services.AddDefaultIdentity<IdentityUser>(options => options.SignIn.RequireConfirmedAccount = true)
        .AddEntityFrameworkStores<ApplicationDbContext>();
    // elided
}
Log into the Web App
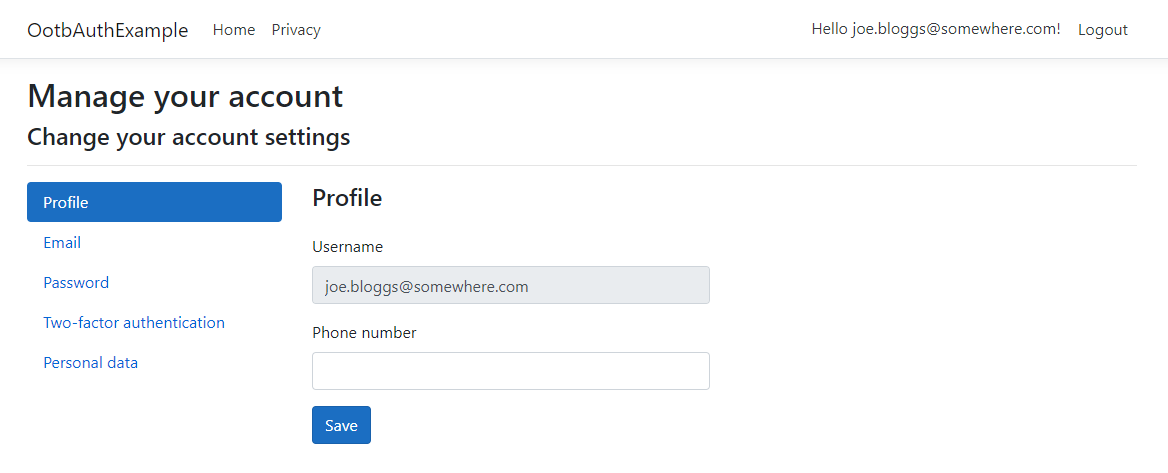
You’re now ready to log in. Click the Log in link, enter your credentials and you’re greeted by… err… a greeting!

Click on the greeting, you’re taken to the account management portal - this is still all out of the box ASP.NET Core! Cool huh?
Are you sure this has actually persisted to a database?
I know, I know… this seems way too easy, and you’re right. You’re probably thinking to yourself “sure, but has it actually saved my credentials to a database somewhere?”
It has, let’s confirm to be sure though shall we?
Return to Visual Studio -> View -> SQL Server Object Browser
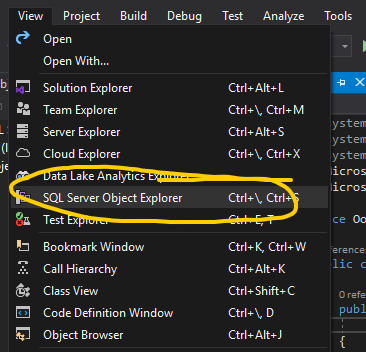
The SQL Server Object Browser will open up as one of your tabs on the left of the Visual Studio IDE.
Navigate to your database instance as follows:
SQL Server -> (localdb)\MSSQLLocalDB -> Databases -> [database name including your project name]
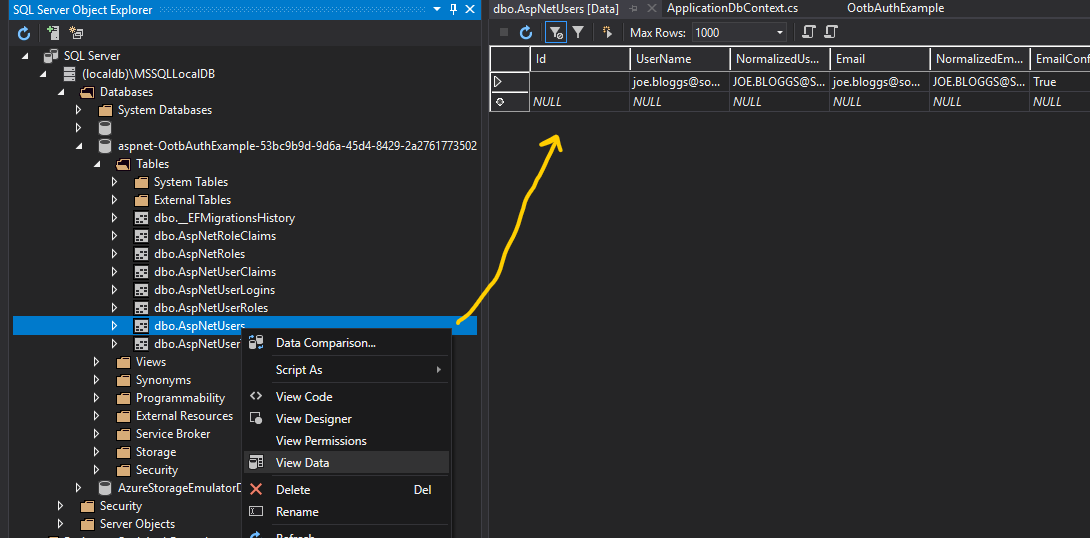
Expand Tables, wait for it to populate, then right click dbo.AspNetUsers and select View Data
You’ll be greeted by a single record that matches your newly registered user.
In closing
What have we achieved today?
As a noob ASP.NET dev, you’ve created a new ASP.NET Core MVC Web Application, enabled Individual User Accounts on it, migrated a Code First Database instance using Entiry Framework Core, registered a user persisting the record to the new database and been able to log that user on.
If you’re new to this, congratulations, that’s quite an achievement considering how simple it was.
The barrier for entry for ASP.NET is continually reducing; Microsoft, and indeed the entire open source community building .NET Core are continually stiriving to make it easy for any dev to get started with this eco-system.
Job’s a goodun!