I cannot believe that it’s been a month since I last posted about this topic. It’s time to finish it off before I forget how I have gone about building, bundling and using this shared code project.
Here are links to all of the posts in this series:
- SPFx projects and Shared Libraries - numero uno
- Why? - SPFx projects and Shared Libraries - part deux
- The build - SPFx projects and Shared Libraries - iii
- CI Pipeline and npm package - SPFx projects and Shared Libraries - May the 4th be with you ;)
- Consuming the package - SPFx projects and Shared Libraries - 5th and final, I promise…
As previously mentioned, our environment was set and I was to go about using some specific pieces of technology to achieve our goals.
What this post will cover
- assumptions and notes before we start.
- create an Azure DevOps Artifact feed.
- this is your npm Registry replacement.
- initial pipeline configuration.
- project build configuration.
- invoking the Pipeline build for the first time.
Assumptions (re-iterated) and notes before we start
- You are using Azure DevOps for your source control.
- You are willing to use Azure DevOps as an npm Registry replacement.
- You are comfortable using gulp and the associated gulp cli
- You should be if you’ve been following Microsoft tutorials ;)
- I have purposefully obfuscated company specific details in all screenshots.
Let’s get started.
Create an Azure DevOps Artifact feed
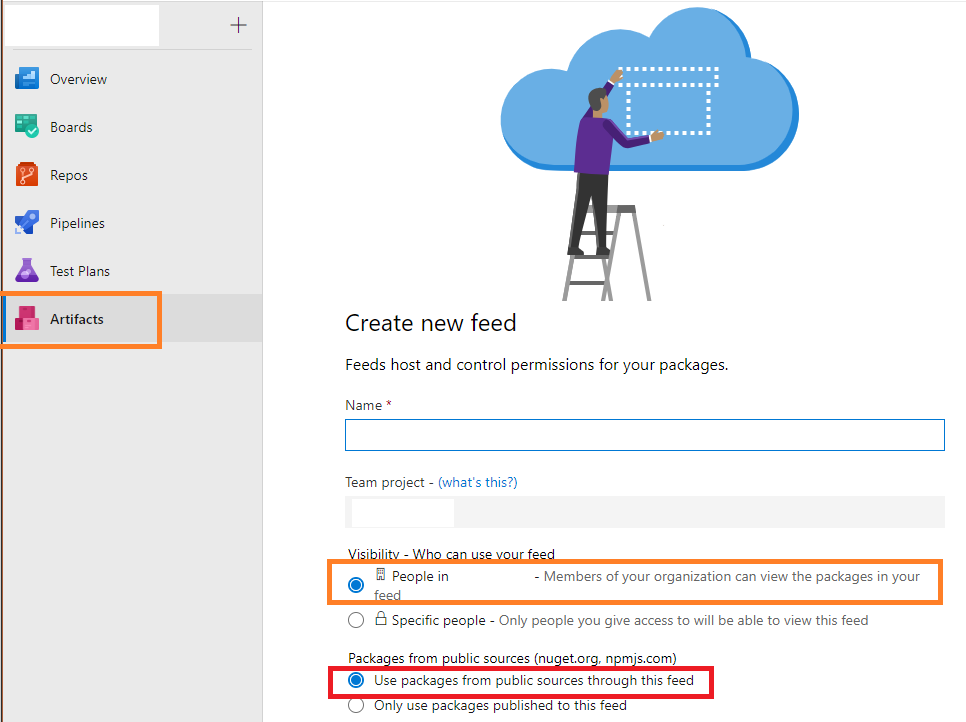
Navigate to your Azure DevOps Artifacts interface for your specific project, click + New feed.
- Give your feed a relevant name.
- I like to follow general npm naming guidelines such as [tld]-[companyName]-[projectName] but the choice is yours.
- Under Visibility, select People in [companyName]
- Under Packages from public sources, select Use packages from public sources through this feed
- This is important as it’s how we will use this as a complete npm Registry replacement in our consuming project/s.
- This is to do with the SharePoint Framework (SPFx) only supporting a single npm Registry.
- Click Create
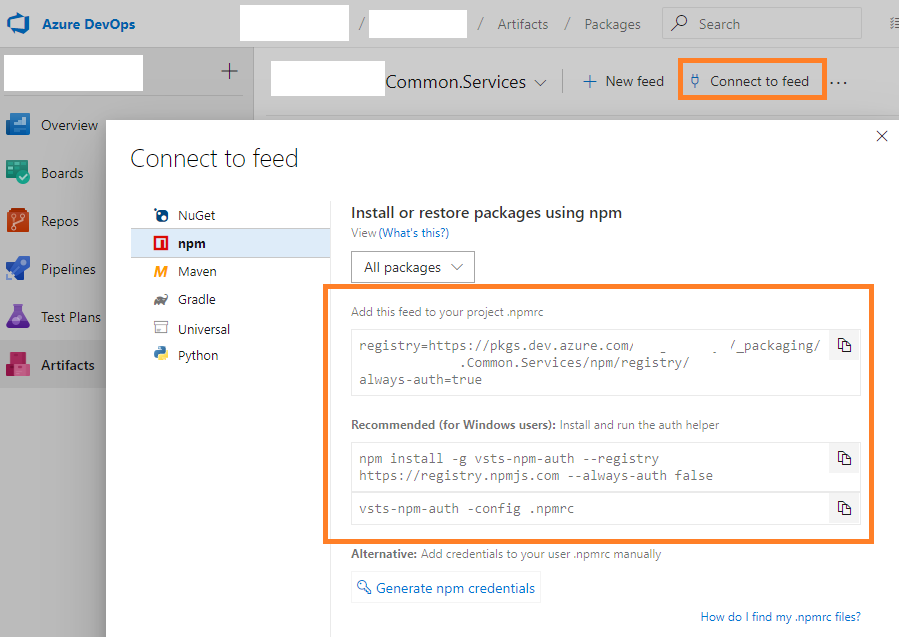
To finish up this part, simply click the Connect to feed button as indicated, and click npm.
Make notes of the name of the feed and configuration details here so you don’t need to come back later :)
Initial pipeline configuration
First up, navigate to your Azure DevOps Pipeline Build interface for your specific project.
https://dev.azure.com/[companyName]/[projectName]/_build
Next, click the + New button and select New build pipeline.
Then select the following:
- Select a source = Azure Repos Git
- Team project = [projectName]
- Repository = [repositoryName]
- Default branck = [master] (recommended)
Note; you can select any source you want, just be aware that if you do, this post will differ from what you see.
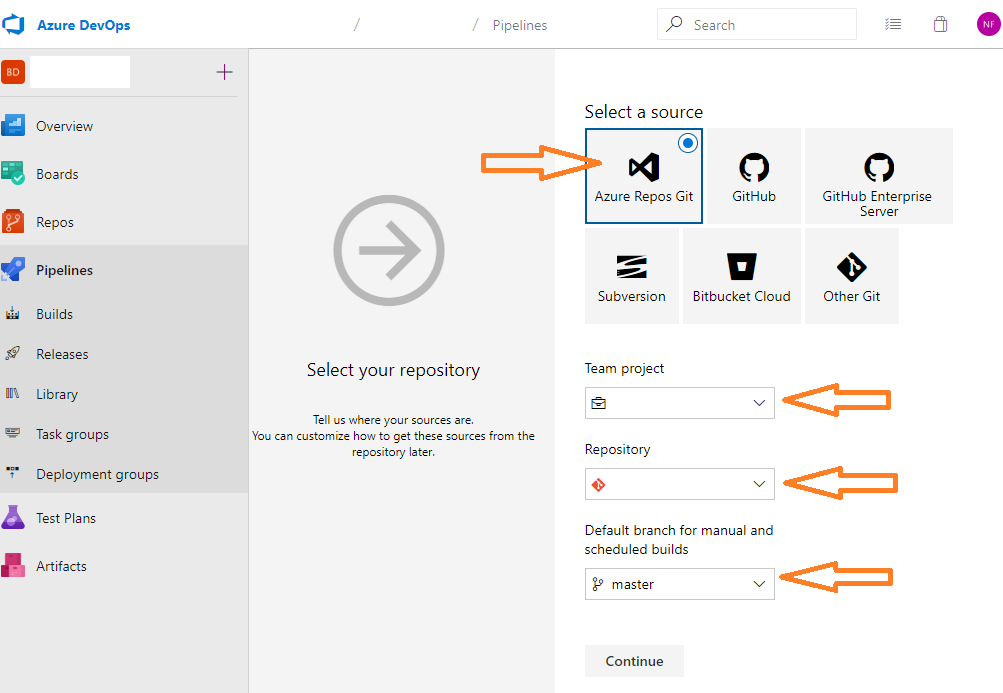
Click Continue
On the Select a template page, select Empty job
It’s now time to configure the Pipeline build job.
On the Tasks tab, enter a name for the build, and leave the Agent pool selection to default (Hosted VS2017 in my example).
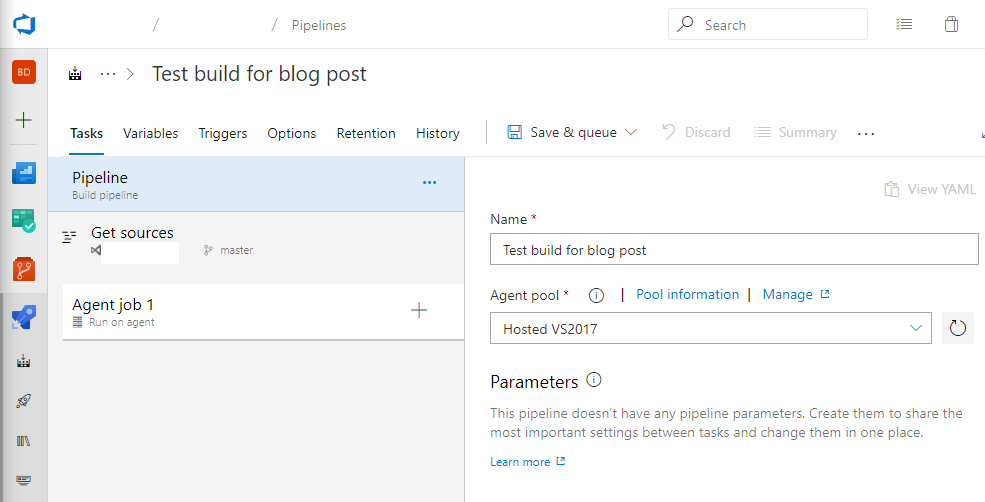
Next click into the Triggers tab
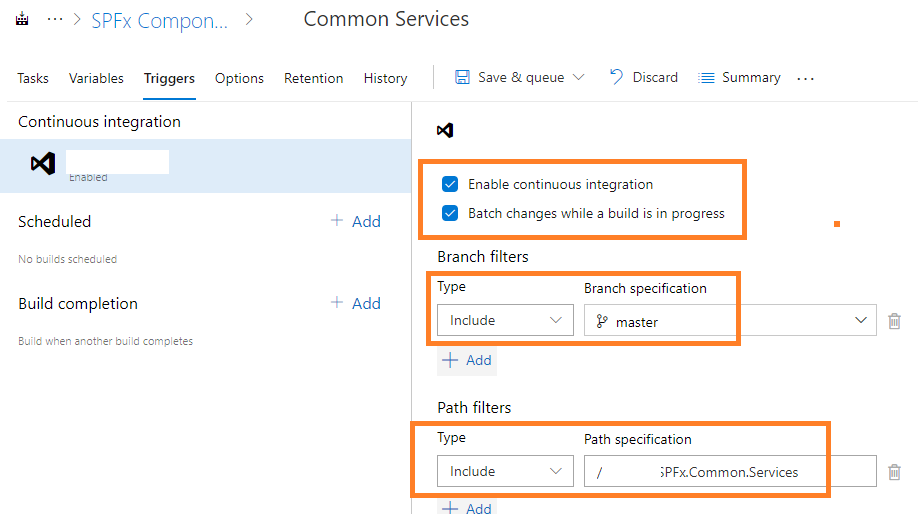
It’s time to setup Continuous Integration on your project. We want to ensure that any changes pushed to your master branch trigger the build validation process. We’ll isolate it to a specific folder later and ensure it builds only when something changes. But for now…
Click Enable continuous integration, and then Batch changes while a build is in progress (the second option isn’t strictly necessary, but it ensures as much is done as possible on a single build job, instead of every push to the Master branch triggering a new build).
Add a branch filter; Type * = Include, *Branch specification = master
Add a path filter; Type * = Include, *Path specification = /[yourProjectPathInYourRepo]
There are many options you can specify when setting this up. Go to the Options tab, you’ll note that the build is enabled by default. That’s fine. We haven’t actually queued a build yet.
Return to the Tasks tab.
Click Get sources and take note of the configuration. Leave it default except for Clean = true and Clean options = Sources. Note the tool-tip:
You can perform different kinds of cleaning of the working directory of your private agent before the build is run.
We’re ensuring that we clean all directories before we even retrieve the latest code from your project repo.
This ends the initial config of the pipeline job.
Project build configuration
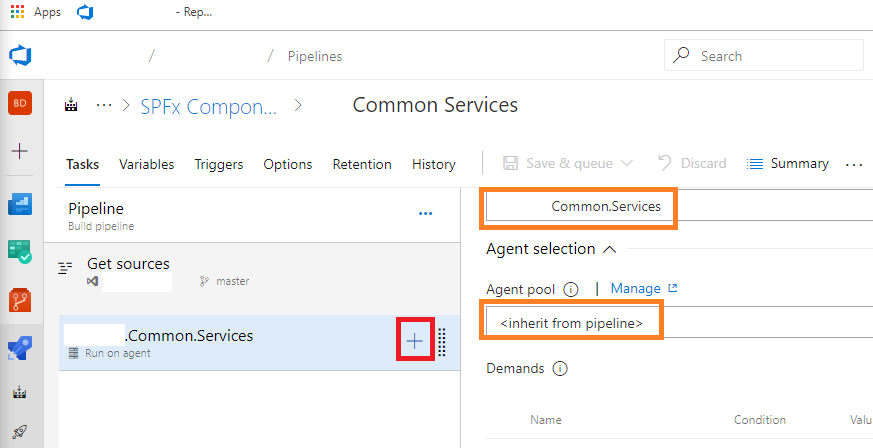
Your task thus far includes a default Agent job.
- Click it
- Rename it to suit
- Ensure that Agent pool = **
** - The rest can be left default
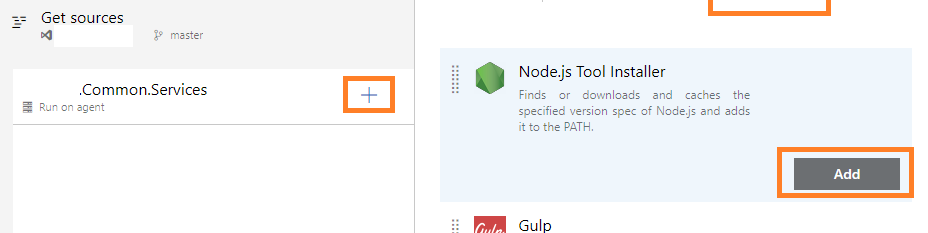
We’re now going to add and configure the following tasks:
- Node.js Tool Installer
- 3x npm
- install
- build
- publish
Click the + button on the agent job indicated in the previous screenshot. Search for “node” and add the Node.js Tool Installer task.
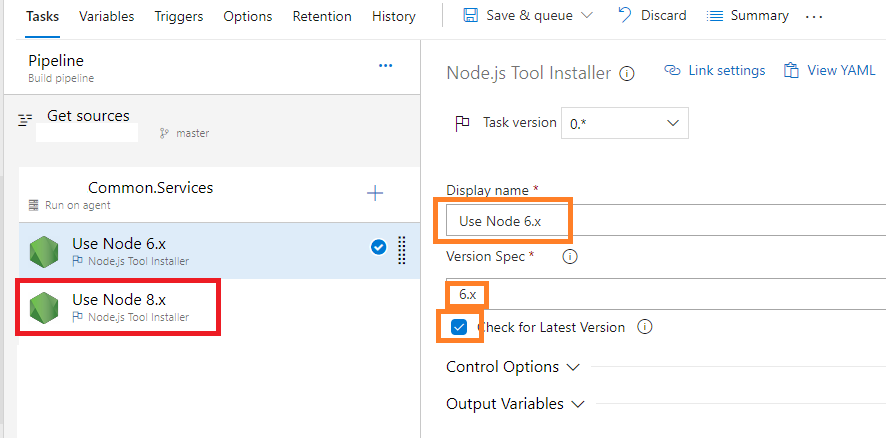
Now, update the Node.js Tool Installer task as follows:
- Display name = Use Node 8.x
- Version Spec = 8.x
- We’re ensuring that we’re using version 8 of node.
- You can and should use other version if your project is built using a different version.
- Check for Latest Version = checked
Note here that I have two Node tasks, you only need one. The second one shows my working config.
We’re going to add 3x npm tasks now, go ahead and click the + button on the Agent job and search for npm.
First npm task:
- Display name = npm install
- Command = install (choose from the dropdown)
- Working folder that contains package.json = [yourProjectPathFolderRelativeToYourRepo]
- this is likely the same as you specified in the Continuous Integration config, without the forward slash (important).
- you’ll use this in the next two tasks as well.
- You can leave all other options default.
Second npm task:
- Display name = npm build (or similar, this is merely a name).
- Command = custom (choose from the dropdown)
- Working folder that contains package.json = [yourProjectPathFolderRelativeToYourRepo]
- Command and arguments = run build
- this is equivalent to the gulp CLI run build command.
- You can leave all other options default.
Third npm task:
- Display name = npm publish (or similar, this is merely a name).
- Command = publish (choose from the dropdown)
- Working folder that contains package.json = [yourProjectPathFolderRelativeToYourRepo]
- Click the Destination registry and authentication drop down to expose the related options.
- Remember setting up the Artifact Feed previously? You need the name of that now ;)
-
Under Registry location, select **Registry select here** - Under Target registry, select [yourArtifactFeedName] (this may resolve to a GUID).
- You can leave all other options default.
Leave the screen as it is…
Invoking the Pipeline build for the first time (bundling)
Sooo… let’s recap.
- We have a TypeScript project that you’ve been working hard on.
- We have an Azure DevOps Artifact Feed setup to replace npm as the Registry replacement for your consuming projects.
- We have an Azure DevOps Pipeline build job setup monitoring the Master branch of your project repository by way of Continuous Integration.
Now what?
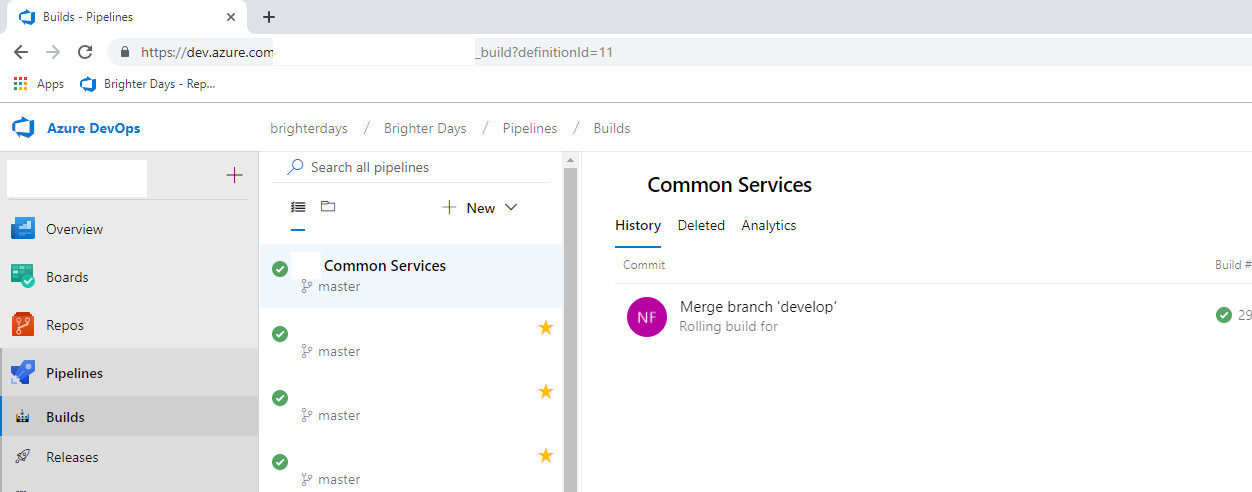
Time to click the ominous looking Save & queue button at the top of the screen. You’ll be redirected to the Build - Pipelines page where one of two things is happening right now:
Either your build is in progress
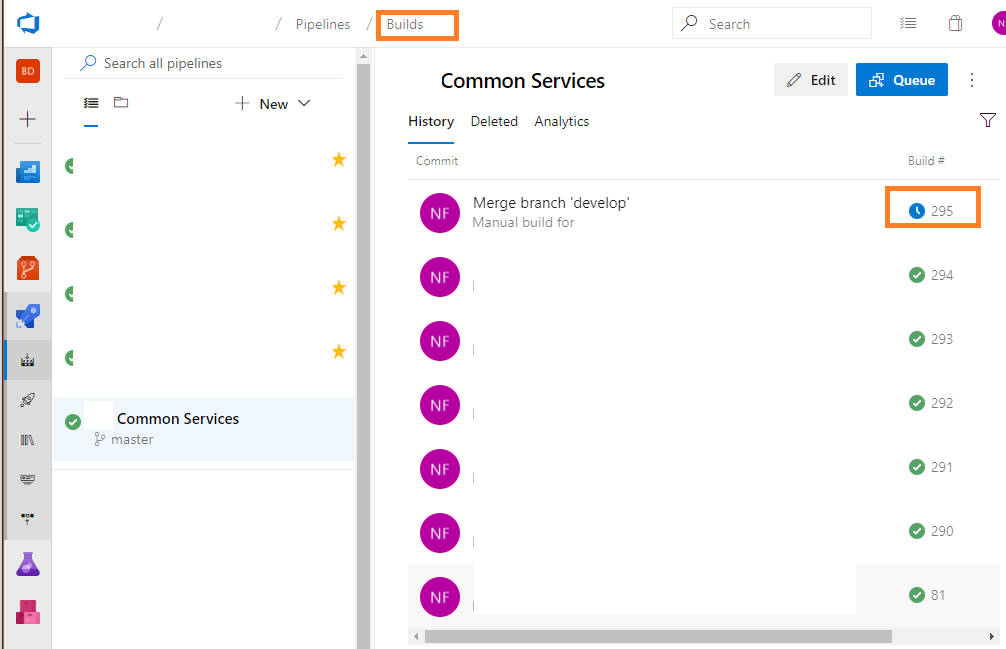
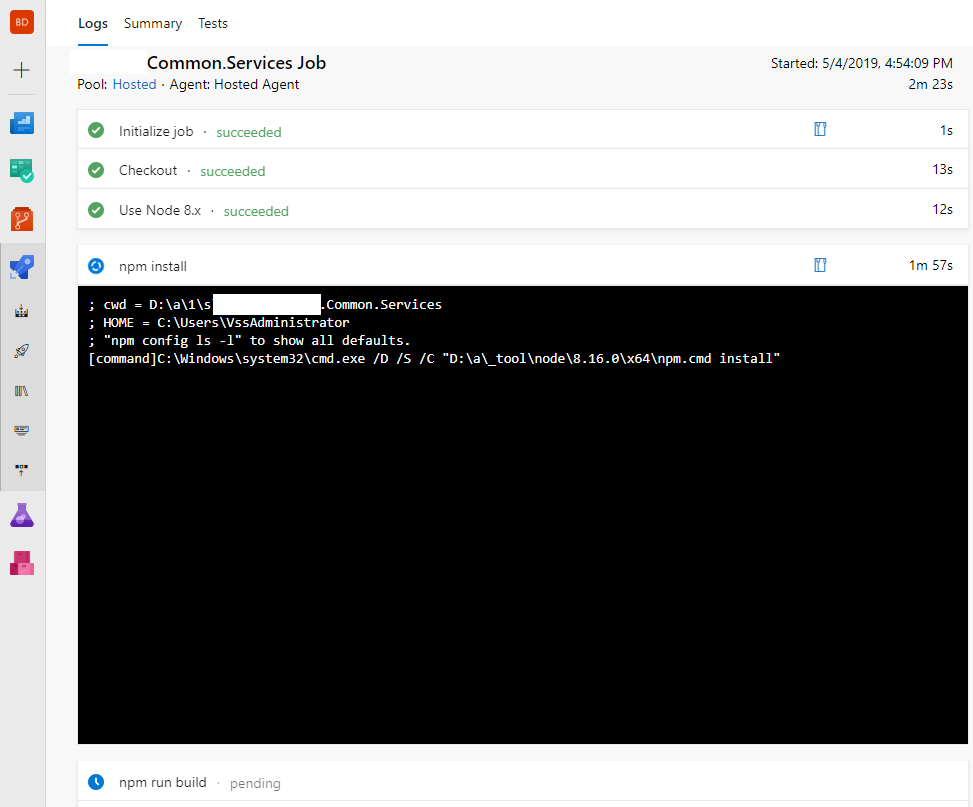
If it’s in progress, click it and watch the build process…
Or nothing is happening
This isn’t a problem. You’ve simply not pushed your code to the Origins’ Master branch - do so now.
Then return to the Build - Pipelines page, your build should be running, click it and watch the build process…
Failures can be due to many aspects too convoluted for this already too long post to touch on. But the most common is where the version of the published package wasn’t changed compared to a previously published package.
You can click any running build task to view verbose logging. You’ll see in this example that I’d neglected to update my package.json version property, on purpose… honestly ;)
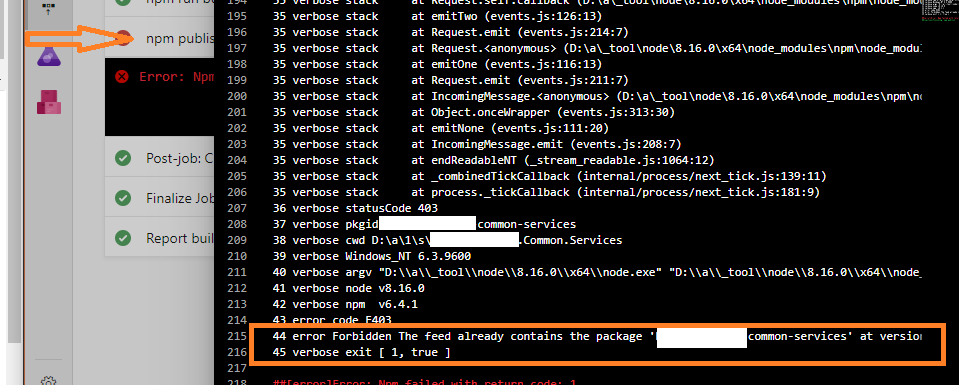
If that happens, simply update that, save the file, and push to the Origin Master again.
Once it’s completed, return to the Artifact Feed you created earlier.
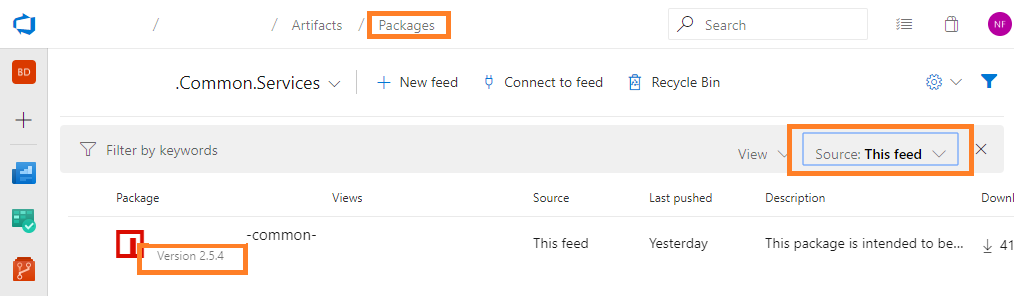
Click the Source drop-down, and select This feed
Ensure that the published version is what you’d expect from your projects’ package.json file.
Wrapping up
I was going cover usage of this package in a consuming project, but this post is already very long and I want to go and drink some beers so you’ll need to wait until the next post for that :)
Have a good one!
Want to read more? Clicky -> Consuming the package - SPFx projects and Shared Libraries - 5th and final, I promise…